
I love playing with pie crust designs. From a classic lattice to cutout shapes there are so many designs to play with. I also love pie crust – it is the best part of pie! This rose crust technique requires a LOT of crust. In fact you need two crust portions just to make the roses. It is a little time consuming but gorgeous. Instead of a typical recipe I wanted to share with you the technique I created to make this. I want to wish all of you a fun, happy Thanksgiving filled with friends, family and delicious food!
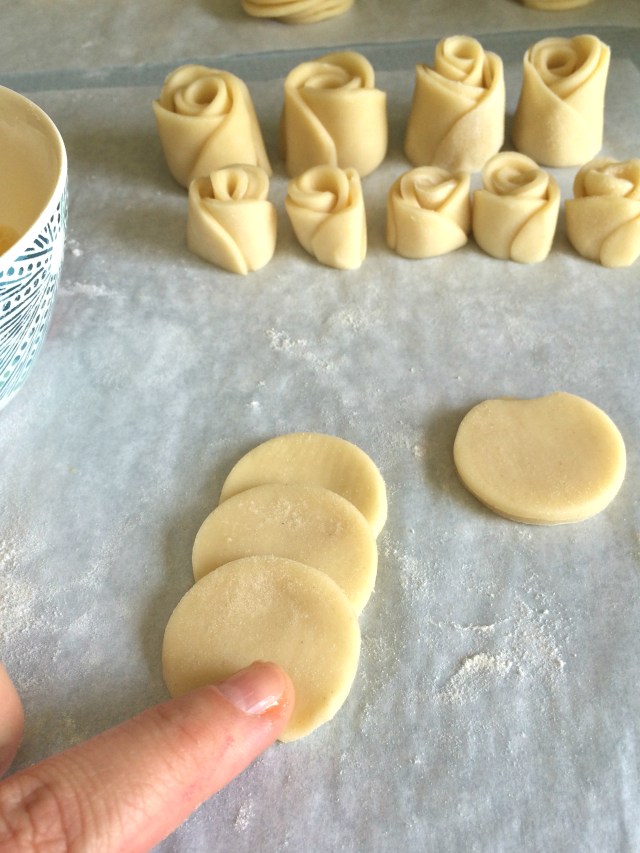
- You will need 3 rounds store bought or homemade crust (one for the bottom and two for the roses). Using a 1.5-2 inch round cookie cutter, cut circles in two of the pie crusts, leaving as little space in between them as possible.

- Lay five circles in a line with a small amount of overlap. Using an egg wash (one egg mixed with 2 Tbsp. water), use your fingertip to put just a drop of egg wash at each place the circles touch to help bind them together.

- Roll them together to form a tube and cut in half to create two roses. Set them aside until you are finished making the roses.

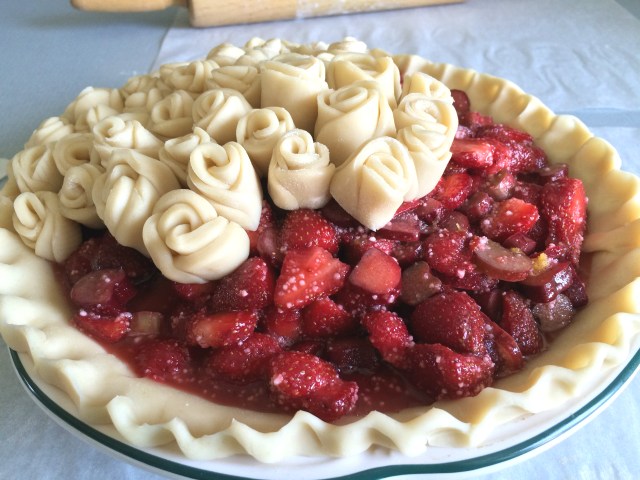
- Starting at the top of the pie filling, gently place the roses in bunches until the entire pie plate is filled.
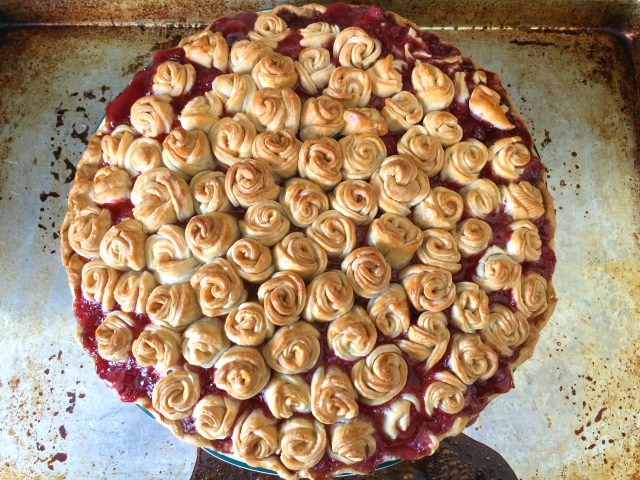
- Bake the pie according to your recipe, except turn the oven 15 degrees lower than it calls for. Bake an additional 20-25 minutes to ensure the top crust is thoroughly cooked.
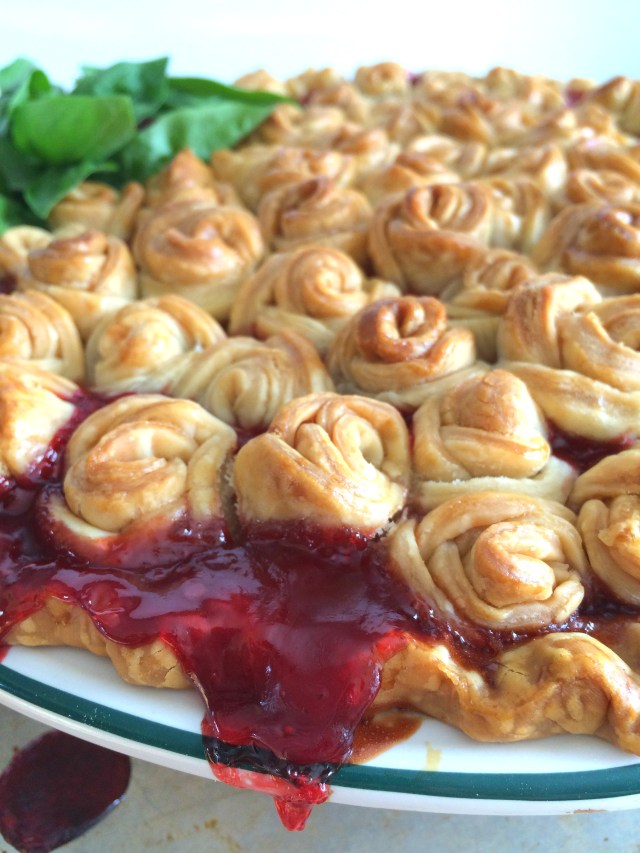
Oh, and just a little tip. Make sure you put you pie plate on a sheet tray lined with foil or parchment paper. As you can see, I forgot to line my pan. The pan is now in the garbage after spending 40 minutes trying to pry the pie plate off of it. Oops!


Beautiful pie Jolena!
Love this technique, it’s so pretty. Although I like a heavy filling to crust ratio, so it may not be for me.
I wonder how you’d like it if you made it with smaller roses and a little extra filling?!
Deep dish pie plate!
Pingback: Wallflower Weekly Finds, 42 - Cooking with a Wallflower
Pingback: Rose Pie Crust | ShoutYourSite
My family would pick them off! They love pie but not so much crust.
My goodness! So gorgeous! Not as difficult as I thought it would be! Thank you very much for sharing your technique. Signed up for your newsletter as well!
Pingback: Perfect Pecan Pie recipe | MarlaMeridith.com
Gorgeous pie!!!
Pingback: Joys & Frustrations of 2015 | the ruby kitchen
Pingback: Crust wars - Honey Pies
Pingback: Marla Meridith | Perfect Pecan Pie
Thank you for this great tutorial! I can’t wait to try it!
I just made the rosettes and they were beautiful. I placed then on the edge of my sweet potato pie… sadly they fell off… and into the pie. Any suggestions for getting them to stick?
Oh no! For single crust pies (pecan, pumpkin, etc) I bake the decorations separately and then place them on after the pie cools. Hope that helps!
Pingback: The Ruby Kitchen