Firecracker Crispy Treats

Summertime if finally here and what better way to kick it off than with a mini-series of summer treats? Summer is full of activities from lazy days at the pool to cookouts so throughout the summer I will be posting simple and easy sweets in addition to regular posts.


Make these easy, patriotic treats to start the celebration of summer off right. Or get the neighborhood together to make batches for local service men and women or veterans as a thank you for their service.

For the sake of keeping these simple, I used store bought crispy rice treats. If you are feeling extra adventurous make your own. Top with white chocolate, Pop Rocks candy and sanding sugar and you have bite size firecrackers that take you back to your childhood.


Ingredients:
Crispy marshmallow rice treats
Blue sanding sugar
White chocolate chips
Strawberry Pop Rocks

Directions:
-Cut stars shapes using a cookie cutter coated in cooking spray
-Melt white chocolate in microwave
-Apply a thin layer of white chocolate on crispy treats
-Top with sanding sugar and Pop Rocks
-Lay on parchment paper until hardened, about 5 minutes
-Store in an airtight container at room temperature

Posted in Other Desserts | Tagged , , , , , | Leave a comment

The (Naked) Cast Iron Skillet

Cast iron skillets are one of the most loved items in any kitchen. They are durable, hold heat incredibly well, are versatile and have the ability to be the best nonstick item in your cupboard. Need to make a cake or cornbread? Great, throw it in the oven and you won’t need to worry about the handle melting off. Want to sear a steak to perfection? Done. Going camping? Throw one in with the gear and you are set for every meal. When a good friend of mine was given a cast iron skillet from his mother, he asked me how to care for it and suggested a Basics 101 type post. I couldn’t agree more and was probably way too excited to do it. Do you see my love for cast iron coming through?

If you are looking to purchase a piece there are some things you should look for and some to avoid. You can go to any big box retailer and purchase a new piece. There is naked (also called raw) iron which is gray-black in color or there is enameled, which is typically white on the inside with a flashy color on the outside. I prefer naked, raw iron for skillets. My Dutch oven and griddle/grill pan is made by Lodge, which makes most of the stuff you see in stores. To get the best made skillets though you cannot go into a typical retailer.

To find the best cast iron hunt antique shops, grandma’s kitchen, yard sales and consignment stores. Brand also matters here as Griswold and Wagner are the most sought after because they are rare and were made incredibly well. My Wagner is actually a WagnerWare (still really good and old, but not as good of quality) that was handed down to me through 2 other generations at least. The Griswold I have is something my grandfather and I found while we were hunting through antique stores one day.

There are a few things to watch out for when buying a used skillet. You want to make sure there are no cracks and look for a machined finish. Modern cast iron companies no longer do a machine finish. Why? It is time consuming, which drives up cost. Who would want to spend $100 on a piece of cookware that will last generations when there is a new iPhone out…that will last maybe 2 years if you don’t drop and crack it 3 weeks after getting it? I will step off my soap box now. Instead these new cost-efficient skillets have bumps which you can see if you look carefully. You want to feel the inside and expect it to be as smooth as glass. If you already have a more modern skillet though, do not fret. You will still get amazing results but it will take more time. One of my favorite ways to get a good season build up is to cook bacon and sausage. Naturally they will not stick much because of the fat content. So make a few indulgent breakfasts (or dinners) and you will have a non-stick surface. It will not be as smooth as glass because of the bumps, but it will still do wonderfully.

One of the things many people are concerned about is how to care for cast iron. It really is easy but everyone has an opinion on how to wash them. Water, no water, soap, no soap, salt, oil…it goes on and on. I use a little of everything depending on what I cook. If I make fish I am definitely using soap and water, but only lightly wiping it with a soapy paper towel. I don’t want that fishy smell lingering. Anything else I typically rinse with hot water and dry, no soap. I then dry completely with paper towels and place a small amount of canola oil on a paper towel and thinly coat the inside. This helps protect the naked iron, especially if you live in a humid area. I also store them with a paper towel inside of it. If it needs scrubbing I use salt. Here is the deal with salt: you do not want to remove the season from your skillet. Scrubbing it to death with steel wool, scrub brushes, soap and the like slowly removes the layers of seasoning. What is this seasoning I am referring to? I like to think of it as years of love which happens to make the skillet non stick and better with age. Using coarse kosher salt does an awesome job scrubbing but adds too, instead of removes, those layers of love.

Click on the below recipes to try with your new (or old) skillet:
Spicy Cheesy Snow Day Cornbread
The Great Crepe
Don’t be a (Roast) Chicken

Posted in 101 & Instructional | Tagged , , , , | 1 Comment

Vietnamese (It’s Almost) Summer Rolls


There is a new International food market in our neighborhood and I could not wait until it opened. So on a Saturday afternoon I went on an adventure to check it out. I fully expected to be disappointed, only because it took over the space for an old regular grocery store that had closed a couple years prior. Apparently in my mind this meant I would be walking into the exact same store, with an extra isle or two thrown in. Boy, was I wrong. I was amazed by what I found. I had never seen so many types of fish under one roof. Aisles and aisles of Hispanic, African, European and Asian foods were everywhere. I actually had a hard time finding things that are staples in America like cream cheese and baking powder.

Then there was the produce. I cannot begin to explain the glee I felt exploring the produce section. Durian, rambutan,  fresh sugar cane, Indian and Japanese eggplants, Thai ginger and basil. Wait a minute…Thai basil? I had finally found it. We have enjoyed Pho noodle soup and Vietnamese summer rolls for so long and I always swooned over the Thai basil. It is so different from the typical sweet basil you find in your average grocery store and I have never been able to find it.  Do not get me wrong here – I adore sweet basil. After all, I am Italian and I am pretty sure my family would disown me if I did not like it. Thai basil has this amazing, almost spicy punch to it that really kicks your taste buds into high gear. I had to make my twist on summer rolls into a refreshing, light lunch using my find of the day.

There is a lot of debate over the difference between the three Asian style rolls: Egg, Spring and Summer. Let me go ahead and settle it for you (in my world at least). It has less to do with the filling and more to do with the wrapper itself. Egg rolls have thick wrappers that are made with well…egg. Spring rolls wrappers are super thin, made with rice and are filled and deep-fried. Summer rolls are eaten raw and use spring roll wrappers that are softened in a bowl of water. The spring roll wrappers don’t really have a whole lot of taste so much as they are just an amazing delivery system for all the fresh, raw goodness.

In my rolls I used steamed shrimp, and julienne carrots, red cabbage, cucumber and…you guessed it – Thai basil. If you cannot find Thai basil certainly use regular basil. Your will place the dry wrapper in a bowl, soak and then roll. There are plenty of videos online on the best way to roll them. I place the filling in the middle, roll the bottom up, side in and the finish rolling it up. I also made a dipping sauce to go with them.

Post questions and comments below and let me know how yours turned out!

Vietnamese Summer Rolls
-Steamed shrimp that has been chilled (they will usually do it for you at the store if you don’t want to)
-Thinly sliced red cabbage
-Julienne carrots
-Julienne cucumber
-Thai basil
-Rice/Spring roll wrappers (most wrappers are naturally gluten-free but check if you have an allergy to make sure)
-Soften one wrapper in a bowl or pie plate filled with warm water.
-Place on plate and layer ingredients in center of wrapper.
-Roll and repeat

Store wrapped spring rolls inside a sealed container. I like to place dampened paper towels in between them so they do not stick together.

For the dipping sauce:
1/3 cup soy sauce
1/3 cup rice wine vinegar
1 teaspoon sesame oil
1 teaspoon fresh grated ginger
1 tablespoon minced garlic
3 scallions, finely chopped
½ teaspoon Sriracha hot chili sauce (or more if you can handle heat…I cannot)

-Mix all ingredients until combined.
-Store in refrigerator.

Photograph Gallery:

Posted in Appetizers, Dairy Free, Fish & Seafood, Gluten Free | Tagged , , , , , | 2 Comments

Lovey-Dovey Chocolate Decadence

I admit it – I am not a fan of Valentine’s Day. The sugar coated sweetness of cupids and hearts just isn’t my thing and my husband and I happily do not celebrate it. So why make a girlie love-y post centered around it? Well, for one thing, there is chocolate. You shouldn’t need another reason. I also wanted to practice more piping chocolate, so I decided the best way to do that was to heart it up and go for it.

This recipe is from my grandmother for her rich and creamy chocolate decadence. This is so rich in fact she would cut 12-16 slices out of it instead of the typical 8-10 slices. Even better it only takes 5 ingredients (7 once I played around with it a few times) and you probably keep most of them on hand. You can make this gluten-free by using almond flour. I have not tried this yet but will next time I make it.

You melt chocolate and butter together and then combine them with eggs. You whip it for 5 minutes, add the flour and sugar and you are done with the batter. I chose to add a little salt and vanilla to it after trying it a few times. It really deepens the chocolate flavor.

This is one of those recipes you need a special piece of “equipment” and in this case it is a spring form pan that costs about $12. I got this set a few years ago and used the 9 inch size. This dessert only bakes for 15 minutes and then goes into the fridge to finish setting. If you try to remove it from the pan and transfer it to a plate before it is totally cooled you will get the result pictured below. Don’t do that. I dropped it on the counter when I noticed it was cracking and promptly went outside to tell my exhausted-from-shoveling husband how disappointed I was (because he really cared after an hour of shoveling with the neighbors). I don’t know why I was in such a hurry to get it sliced – it is not like I am going anywhere anytime soon! In any case please wait. You will not regret it. When it is time to cut dip a butter knife in hot water, wipe dry and then slice. Continue for each slice to get smooth, even slices (if you didn’t drop it like me…).

I’ll admit, this doesn’t look like something I’d be thrilled to eat. But I promise it looks amazing if you don’t drop it and have terrible lighting.

For the hearts and words I just melted white chocolate in the microwave and placed in into a disposable pastry bag with a small round tip. I am terrible at making hearts so I printed some from an image search to trace by placing it under a sheet of parchment paper. I tried to get fancy with the scrolls but kept messing them up (hence my need to practice) so I ended up using the main shape and just winged it with the text. White chocolate hardens very quickly so after about 5 minutes in the fridge they were ready to go.

PS – you will notice the recipe for the raspberry sauce below as well but no picture. I forgot to get the raspberries and there is currently 18 inches of snow on the ground so needless to say there is no sauce. I have made it more than a dozen times and it really is the perfect complement to the decadence. It helps cut through the richness and brightens the dark flavor.

This is an easy dessert to make for your love or anyone who loves chocolate. Post questions and comments below and let me know how yours turned out!

Chocolate Decadence
16 ounces semi-sweet chocolate
2/3 cup butter
5 eggs, beaten
2 tablespoons sugar
2 tablespoons all purpose flour
1 teaspoon salt
1 teaspoon vanilla
Raspberry Sauce
-Preheat oven to 400 degrees.
-Line the bottom of a 9-inch spring form pan with parchment paper, set aside.
-Bring chocolate and butter in top of double boiler and bring water to a boil, lower heat and cook until  chocolate and butter melt. Or melt in 30 second increments in the microwave.
-Add approximately 1/3 cup of chocolate mixture to eggs while whipping. Gradually add remaining chocolate mixture to eggs beating at medium speed of an electric mixer for 10 minutes.
-Add sugar, flour, salt and vanilla just until mixed in.
-Pour into prepared pan.
-Bake for 15 minutes.  (Cake will not be set in center-this is expected! Do not pass 15 minutes.)
-Chill at least 4 hours or overnight.
-Spoon about 3 tablespoons Raspberry Sauce onto each dessert plate; place a wedge of chocolate dessert on Raspberry Sauce, garnish if desired.

Raspberry Sauce
1 cups fresh raspberries
1 cups water
1/8 cup sugar
1 tablespoons corn starch
1 tablespoons water
-Place first 3 ingredients in sauce pan and bring to a boil, reduce heat, and simmer 30 minutes.
-Put Raspberry mixture through a food mill or sieve and discard seeds.
-Return to saucepan, set aside.
-Combine cornstarch and 1 tablespoons water in a small bowl, stirring until smooth.
-Add cornstarch to Raspberry mixture. Cook over medium heat stirring constantly until mixture comes to a boil.
-Cook one additional minute, stirring constantly.
-Remove from heat and cool completely.

Photograph Gallery:

Posted in Other Desserts | Tagged , , , , | 2 Comments

The Whole (Avocado) Enchilada

It has been a very long and very cold winter so far. Something fresh, green and bright is definitely in order. It certainly isn’t going to happen outside anytime soon so I decided to take matters into my own hands and make one of the standbys I usually reserve for warmer days – Avocado Enchiladas. Almost everything that goes into these is green in color and bold in flavor. Even better they are reasonably healthy, naturally gluten free and super comforting.

I like to use rotisserie chicken in enchiladas because it makes the whole process quick and simple. Well, I thought that until I almost caught our house on fire. Notice the weird lighting in almost all the photographs? That is because I got carried away chopping and taking pictures, failing to notice that I turned the wrong burner on the stove to toast the tortillas. I finally wondered what that weird popping noise was and turned to find the melting plastic container with the chicken smoking, flaming and melting onto the electric burner. Thankfully my husband came to the rescue before it got worse. By the time we were done cleaning up the mess and de-smoking the house the sun was quickly setting. I even managed to break the lock on the window trying to close it. Seriously…how do I manage to do these things? In any case, these became a two day process due to the lack of sufficient lighting and a smoke filled kitchen. During a normal day they take much less time – I promise!

The best part about these enchiladas is the sauce. We even had some left over and used it as dip for tortilla chips. It is that good. Avocado, lime juice, scallions, jalapeno, salsa verde, Greek yogurt, parsley and cilantro are combined to make a super creamy, bright amazing sauce. A word about cilantro: you either love it or hate it. There is no in-between. If you have never tried it taste it before you slap a handful into the food processor. If you are one of the hardcore haters then just leave it out and it will still be awesome. All you do is throw everything into the blender or a food processor and give it a whirl until smooth, adding a little water if you want it a bit thinner.

collage

The fun part of enchiladas is you can stuff them however you’d like. Since the sauce on these is such a powerhouse I like to keep the filling simple. I used chicken (you know, the kind that did not catch fire), red onions and white cheddar cheese. I prefer to keep the onions raw because I think the bite of them holds well to the sauce. I also used gluten free corn tortillas. As most gluten free people know, corn is naturally gluten free. You have to make sure you check the package though because it is a processed food and has a chance to become cross contaminated with gluten products. So, if you have a severe sensitivity please make sure you check for certified gluten free products! Toast your tortillas on both sides in a dry skillet set on high. Again, make sure you do not have something flammable near the burner…

Once the sauce is done and the tortillas are toasted you can stuff and roll your enchiladas. I put a little sauce inside each one followed by the chicken, onions and finally the cheese. I have made these without any cheese and they were just as delicious and creamy.

Roll the stuffed tortilla up and put it seam down into your baking dish. I managed to stuff 8 into my oddly shaped little dish.

Once they are all rolled I put more sauce on top and the leftover onions and cheese. Most people like to go crazy with the cheese but I was holding back in my attempt to make sure these stayed healthy. It is your kitchen though so go crazy!

Bake until the cheese bubbles and they are warm throughout. Sprinkle them with leftover parsley and cilantro if you dare.

Dig in.
Have seconds.
Pretend it is summer.

How did yours turn out? Post questions and comments below!

Avocado Enchiladas

-3 ripe avocados
-1-3 jalapenos, cut in half and seeded (depending on how much heat you like)
-Juice of one lime
-6 scallions (just the green part)
-1 cup salsa verde
-½ cup plain Greek yogurt
-Handful of cilantro
-Handful of flat leaf parsley
-1 tsp cumin
-8 corn tortillas
-Rotisserie chicken or 2-3 cooked breasts
-½ cup white cheddar cheese (or more if you prefer)
-1 cup small diced red onion

-Place first 9 ingredients into a food processor and puree until smooth. Add a small amount of water if you find it is too thick. You can also use a blender, you just will want to chop everything so you don’t kill your motor.
-Toast tortillas in a dry skillet set on high. On my old school electric coil stove this takes 10-15 seconds per side. You want them to get just a touch of color so they are pliable.
-Shred chicken with two forks. It is best to do this while it is still hot.
-Spoon a thin layer of sauce on the bottom of your baking dish.
-Spoon a small amount of sauce onto tortilla. Layer chicken, diced red onion and cheese inside and then roll and place inside baking dish. Repeat with the rest of the tortillas.
-Pour the rest of the sauce on top and throw any leftover red onion on top. Add cheese and bake at 350 degrees for 10-15 minutes until cheese bubbles and is melted.
-Top with parsley, cilantro and scallions if desired and serve.

*If you want to make these ahead they freeze well. Just do not bake them before freezing. Thaw overnight in refrigerator. Bake for 30-45 minutes until warm throughout.

Photo Gallery:

Posted in Casseroles, Gluten Free | Tagged , , , , | Leave a comment

Spicy Cheesy Snow Day Cornbread

Well, yet another snow storm is passing through the East. Not shocking as it is the 368th one this year (I may be slightly exaggerating). It seemed like the perfect opportunity to come home early and make a quick side for tonight’s chili: cornbread.

On snow days it seems the right thing to do is to have a warm, comforting meal and embrace the white wonderland. My husband plans on making chili and spicy cornbread cake seems to be the perfect accompaniment.  While I am not typically fan of premade mixes, Jiffy Corn Muffin Mix has been a staple in my mother and grandmothers kitchens for as long as I can remember. So, of course it was a staple in mine as well. I went on a grain-free rampage a few months ago but I did manage to find one lonely box in the very back of the cupboard about to expire. I had to do the sad little box justice. The basic recipe on the back of the box is the one I used. You just add milk and an egg.

P1110498

I decided it needed some love though. After all, this poor little box was neglected for so long. Scallions, cheese, red onions and hot sauce added in make for a happy cornbread. You can use your imagination and add whatever you would like though.

P1110501

In addition to mixing the hot sauce in, I poured some on top as well. I also mixed some white cheddar cheese into the batter. If you really want some cornbread magic, place an iron skillet in a cold oven. Turn it to 400 degrees and let it warm up while you make the mix. When it is time to pour in the batter, place a tablespoon of butter in the hot pan and swirl, then pour in batter. You will get an amazing crust! 

Post questions and comments below. Happy snow day!

Ingredients:
1 box Jiffy Corn Muffin Mix
1/3 cup milk
1 egg
¼ cup diced red onion
¼ cup green onions (scallions)
½ cup cheddar
Hot sauce, to taste
1 Tbsp butter

Directions:
-Place iron skillet in oven. Set temperature to 400 degrees.
-Briefly stir muffin mix, milk and egg until combined.
-Mix in onion, scallions, cheese and hot sauce.
-Swirl butter in hot skillet*
-Pour batter into hot skillet. Put a few dashes of hot sauce on top.
-Place in oven and bake 20-25 minutes until a knife inserted in the middle is clean.
*Notes: in place of an iron skillet you can use a cake pan, brownie pan or any other oven-proof dish. Cooking times may vary so check at 20 minutes and every 3 minutes thereafter.

Posted in Breads | Tagged , , , , | 3 Comments

The Leaning Tower of Cake

Chocolate. Peanut butter. Cake. Need I say more? I am not much of a peanut butter lover (please don’t stop reading because of my indiscretion) but when it is paired with rich, decedent chocolate there is something sublime about it. When it is combined then in cake form with silky frosting and in mini-tower form I just cannot speak ill. Oh, and then there is the frosting. Let me just warn you I may have gotten carried away taking pictures during the steps of the frosting.

This cake and frosting is adapted from the Mile High Chocolate cake from Epicurious. It is moist, super chocolaty and the perfect partner to the strong flavor of peanut butter. It comes together quickly and bakes even faster when done in a sheet pan as I did. There are four sizes of sheet pans: full, two-thirds, half and quarter. I have half sheet pans because they are perfect size for almost anything you are using them for and easy to store in a small kitchen. After you make the batter you bake and then cool the cakes. You don’t even have to worry about flipping them out of the pans, which is always a high anxiety moment for me because I fear I will break it in half.

The second step of these adorable little cakes is the peanut butter filling. Whip all the ingredients in a bowl and you are done. The cream cheese gives the filling a nice lightness and the maple syrup that not only adds an element of sweetness but a wonderful depth of flavor.

P1110102

Third part (my favorite part) is this frosting. This frosting blew my mind. It is a boiled frosting – yes, boiled. For a hardcore Swiss and Italian Meringue Buttercream girl this was definitely a new way of doing things.

P1110110

So, you take sugar, chocolate, chocolate powder, salt, milk and flour (yes, flour) and boil it into a thick almost ganache like bubbly goodness and then let it cool on a plate.

collage 2

While it is cooling you whip the butter until it is pale and creamy. You want it to look like whipped cream.

P1110195

Once the butter is whipped and the chocolate mixture is cool you slowly add it and beat it until it is combined. What you end up with is this fluffy, smooth frosting that looks like chocolate mousse.

P1110242

To assemble these little towers I just alternated cake and peanut butter filling. It started to lean so I decided I had better quit before it ended up on the floor. At that point I had already overfilled my piping bag once and had frosting all over myself and the counter so I decided to quit before things got worse. The cake is very tender so I decided to pipe the filling instead of spreading it with a knife. If you don’t have piping bags you can cut the tip off a plastic baggie and get the same result. Another thing I did when frosting the cake was put a “crumb coat” on it and then let it harden in the refrigerator for about 10 minutes. A crumb coat helps the cake stay together when you are frosting it so you do not rip and destroy it. I have never been great at frosting cakes. When I saw someone do this it changed the way I approached the once burdensome frosting of the cake.

collage

If you want smooth sides the best way to get it is with an offset spatula and a cup of hot water. Dip the spatula in and then shake off the excess water. Place it flat against the frosted cake and twirl the plate around. Re-dip and shake as needed. To top it off I decided it needed a little color and the giant jar of sprinkles I have were the obvious choice. I may have smashed the side of it when I cut it….it really is a little leaning tower of cake!

P1110342

Let me know how yours turned out! Post questions and comments below.

 Ingredients for the Cake:
– 5 ounces (145 grams) good-quality dark or extra dark (semisweet or bittersweet) chocolate, chopped (I used Ghirardelli 60% chocolate chips.)
– 2 1/4 sticks (260 grams) unsalted butter, softened
– 2 3/4 cups (315 grams) cake flour (not self-rising), sifted
– 1/4 cup (24 grams) unsweetened cocoa powder (not Dutch-process. I use Ghirardelli Unsweetened Cocoa Powder.)
– 1 teaspoon (5 grams) baking powder
– 1/2 teaspoon (4 grams) salt
– 4 large eggs, at room temperature at least 30 minutes
– 1 cup (200 grams) granulated sugar
– 1 cup (220 grams) packed light brown sugar
– 1 1/2 tsp. vanilla extract (Don’t use the imitation kind!)
– 2 cups (475 mL) sour cream

Ingredients for the frosting:
– 1 cup (200 grams) granulated sugar
– 6 tablespoons (47 grams) all-purpose flour
– 6 tablespoons (36 grams) unsweetened cocoa powder (the same type you used in the cake)
– 1 1/2 cups (360 mL) whole milk
– 4 ounces (115 grams) good quality chocolate (the same type of chocolate you used for the cake)
– 1 Tbsp. vanilla extract
– 6 sticks (680 grams) unsalted butter, at room temperature
– Small pinch of salt

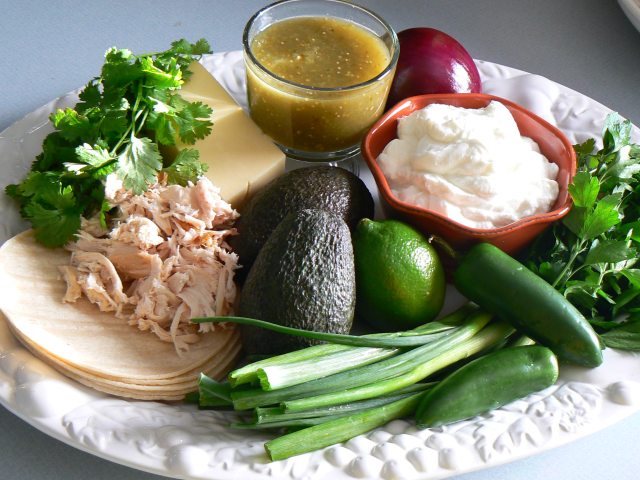
Ingredients for the filling:
– 8 oz. cream cheese, at room temperature
– ½ cup peanut butter
– 3 tbsp unsalted butter, at room temperature
– 4 Tbsp. maple syrup
– 1 tsp. vanilla extract
– Small pinch of salt

Directions for the cake:
-Preheat oven to 350°F with rack in middle. Butter two half sized sheet pans, line with parchment and then butter again. Then dust with flour, covering all sides and knocking out the excess.
-Melt chocolate with butter, then cool. I did it in the microwave in a glass bowl. Melt on high for 45 seconds, stir well.  Then repeat in 20 second batches. You do not want the chocolate to burn it so stir well. It shouldn’t take more than a minute or so.
-Sift together flour, cocoa powder, baking soda, baking powder, and salt.
-Beat eggs, sugars, and vanilla in a large bowl with an electric mixer at medium speed until pale and thick, 3 to 5 minutes. At low speed, mix in melted chocolate until incorporated, then add flour mixture in 3 batches alternately with sour cream, beginning and ending with flour mixture and mixing until each addition is just incorporated.
-Spread batter evenly in pans and tap pans several times on counter to eliminate air bubbles. Bake until cakes pull away from sides of pan and a wooden pick inserted in center of each comes out mostly clean, about 10-20 minutes. You want to check at 10 minutes and then every 3 minutes thereafter. If you use a dark pan check sooner.
-Cool in pans until completely cool, about 1 hour.

Directions for the Filling:
-Combine all ingredients and whip until combined and fluffy. Set aside until you assemble.

Directions for the Frosting:
-Whisk together sugar, flour, cocoa powder, and a pinch of salt in a small heavy saucepan. Over medium heat, whisk in milk and cook, whisking constantly, until mixture boils and is smooth and thick, 3 to 5 minutes.
-Remove from heat and whisk in chocolate and vanilla until smooth.
-Transfer to a plate to cool to room temperature, covering surface with parchment paper to prevent a skin from forming.
-Beat butter with an electric mixer until pale and creamy (approximately 2-4 minutes), then add cooled chocolate mixture a little at a time, beating until frosting is fluffy and spreadable.

To assemble Towers:
-Using a 2½ inch round cutter (or really, a glass can be used) cut shapes into cake, dipping cutter into flower each time. The number of circles you get will depend on the size of the cutter. I got about 35 circles, making 7 little towers.
-Place one circle on plate, top side down, and pipe peanut butter filling in a smooth layer. Continue, finishing with the 4th layer of cake on top.
-Frost outside of cake with a crumb coat, then let harden in fridge for 10-15 minutes.
-Remove cake from fridge and then frost with about half a cup of frosting, smoothing as much as possible.
-Dip an offset spatula in a cup of hot water. Tap off excess water and use it to smooth the frosting.
-To make the decorative border I used a small closed star tip in a piping bag. You could also use the tip in a zipper bag, or forgo the entire thing and eat as is.
-Apply sprinkles liberally (is there any other way?)

Photo Gallery:

Posted in Cakes & Cupcakes | Tagged , , , , , | 5 Comments

Don’t be a (Roast) Chicken!

Roasting a chicken is one of the easiest things you can do and also one of the most impressive. You just prepare it, stick it in the oven, set a timer and forget about it. What could be easier or prettier?

If this is your first time roasting a whole bird I recommend one in the 3-5 pound range. The bigger the bird the more intimidated people tend to get. They come wrapped in plastic similar to a turkey. Some will have the neck and giblets inside the main cavity, others will have the giblets where the neck should be. It depends on the company so check both places every time. You will also need something big enough to fit the whole bird. While a roasting pan with a rack is ideal they take up a lot of space, and in my teeny tiny kitchen we are already bursting at the seams so I use a cast iron skillet. The only disadvantage of this method is that the skin on the bottom of the bird does not crisp up. We usually just eat the breast skin anyway because it crisps up so nicely.

P1110034

A lot of people overcook chicken because they are afraid of getting salmonella poisoning. If you are worried about it being cooked all the way through make it fail proof and buy an instant read thermometer for about $10. If you are a gadget person you can get one for about $20 that has a cord attached to a display that can be programmed to alarm when it is done. In any case, when the internal temperature reaches 165°F it is safe. Remember moist=tender and dry=tough and gross. As long as the meat is no longer pink and the juices run clear it is perfectly safe. You did not know chicken should be juicy, did you?

P1110041

Once I rinse my bird off in cold water and dry it, I take softened butter, salt, pepper, rosemary and sage and make a compound butter out of it. This butter gets smeared in between the skin and the meat, as well as all over the entire bird. If you are not sure how to get under the skin, there is a great how-to video by Epicurious here. Try to make sure you have everything ready to go before doing this. You haven’t experienced stress until you have butter all over your hands and someone rings the doorbell. Then, you curse the faucet for taking so long to heat up, knowing it is an impossible task to wash your greasy hands in cold water. Meanwhile you are yelling at the front door to hold on a minute as you hastily squirt half a container of soap on to hurry the process only to open the door to someone soliciting you to get new windows. I am getting off topic here, aren’t I? Let’s get back to the bird. Don’t be stingy on the salt either! It is amazing how much difference salt makes in any dish. I use coarse kosher salt for almost everything. If you have coarse sea salt lying around sprinkle some of that on top just before putting it in the oven. You will get an amazing crisp skin.

P1110047

Once it is thoroughly covered in the compound butter I stuff the cavity with onions, lemon and parsley. You aren’t going to eat what is inside the cavity, but you will be amazed how much flavor works into the meat while it cooks. I also tie the legs together. This isn’t a necessary step but it does help to cook more evenly. You can find cooking twine at big box kitchen supply stores and some grocery stores. The easiest way to tie the legs together is by taking a foot long piece of twine and making a loop around one leg and knotting it. Then loop the other side around and tie it like a bow. You will need to cross the legs (see the above picture) to get it nice and tight. I also pour just a little white wine or chicken broth into the pan and cover it to help keep it moist while cooking. The foil traps all the steam in and helps retain all the juice we want. The bad part is you get soggy skin so after about an hour you discard the foil and spoon the juices onto the bird. By the time it is finished the skin is nice and crisp. Once it is done, let it rest for 10 minutes before slicing is so all of those yummy juices stay in.

Give roasting a chicken a try- it is way too easy to put together and great for a lazy Sunday dinner. Post questions and comments below!

Lemon & Herb Roast Chicken

1 whole chicken, 3-5 pounds, giblets removed
2 lemons
1 onion
Handful fresh flat leaf parsley
Half a stick of butter
2 Tbsp dried rubbed sage
2 Tbsp dried rosemary
1 tsp fresh cracked black pepper
1 Tbsp kosher salt
¼ cup white wine of chicken broth
Kitchen twine (optional)

Preheat oven to 375°F. Rinse chicken in cold water and pat dry. Chop onions and lemon small enough to fit inside cavity of chicken. Set aside. In a small bowl thoroughly combine the butter, sage, rosemary, pepper and salt. Place compound butter in between breast meat and skin, being careful to not tear the skin. Rub all over the rest of the chicken. Sprinkle the inside of the cavity with a pinch of salt and stuff with onions, lemon and parsley. Tie legs together and place in cooking vessel. Sprinkle with another pinch of salt and cover with foil. After an hour discard the foil, spoon the juices over the bird and cook until the internal temperature reaches 165°F. A rule of thumb is approximately 20 minutes per pound, plus an additional ten minutes. Remember though, a thermometer is your best friend when cooking poultry!

Photo Gallery:

Posted in Poultry | Tagged , , , | 1 Comment

The Great Crepe

I remember getting up on early mornings watching my grandmother create delicious breakfasts for the guests at her bed and breakfast. One of my favorite things to watch her make (and eat!) was her simple, elegant crepes. I loved watching her use those giant iron skillets over and over again, swirling batter into giant thin circles. I inherited one of those skillets from my mother, which undoubtedly came from my grandmother.

Crepes seem to have a bad reputation. A lot of people tend to be intimidated by them because they are so thin and large. The reality though is if you can make pancakes, you can make crepes! The first step into making this journey a little easier is the size of the pan. Don’t go crazy and think you have to go out and spend $80 on some large fancy crepe pan. Any nonstick skillet in the 6-8” range will get the job done, especially if this is your first attempt.

P1100999

The second thing that I am convinced makes crepes easier to manage is the way you prepare the batter. You combine everything in a blender and let it whirl around for two minutes. After that just pop the lid on and let it sit in the fridge overnight. What happens is all those bubbles you just created will settle – less tearing. When you are ready to make your crepes make sure you have everything set up ahead of time. This way, you don’t get stressed trying to figure out where the roll of paper towels is while trying to flip a crepe, fuss at the dog to stop barking and answer the phone at the same time. Oh, is that just me? Moving on…

P1110009

Your pan should be on medium heat and greased with a little butter. You will know if the temperature is too hot when you drop the butter in and it turns brown. If this happens just wipe the pan out, turn down the heat and try again. When you pour batter you want to do it directly in the center and then gently swirl it around until reach the edges of the pan. They cook very quickly. You know they are ready to flip when the top turns opaque. Do not look for bubbles. Remember, we got rid of those on purpose!

P1110008

Once it is flipped it only takes a few seconds for the other side to be done. The first side should have a few sports of golden brown and the second side will have few if any spots. When it is done place it on a paper towel and cover with another paper towel. Wasteful? Yes. In my opinion though, it is a necessary step if you do not want them sticking together.

This happens when you don’t swirl enough & add more batter. This is also why you made a double batch, right?

Grandma always filled the crepes with mandarin oranges or strawberries and a mixture of vanilla, cream cheese and whipped topping. While I have tried to use fresh made whipped cream instead of the alternative (you know, that delicious tub of oil and chemicals we all secretly love) it just does not hold up the same texture that I remember, and that will not do. Plus, if it is good enough for grandma it is good enough for me! You can use your imagination with fillings though – sweet or savory. Caramelized onion and mushroom with goat cheese is one of my favorite. Or fill it with Nutella for a yummy dessert!

P1110012

I hope you enjoy these and experiment with different fillings. They are great too when you have company over because you can make the crepes ahead of time and then everyone can fill them with their favorites. Leave your comments below – thanks for reading!

P1110017

Makes 4-8 crepes, depending on pan size.

Ingredients for Crepes:
½ cup flour
¼ cup water
¼ cup milk
2 Tbsp. butter, melted
2 eggs
Pinch of salt

Ingredients for Grandma’s Filling:
6 oz soft cream cheese
4 oz whipped topping (in the tub)
1 tsp vanilla extract
1 can mandarin oranges (packed in water not syrup!)

Directions for the Crepes:
Mix all items in a blender for 2 minutes. Cover and refrigerate overnight. In the morning heat skillet on medium and add a small amount of butter. Put about ¼ cup batter into the pan and swirl it to fill the edges (you may need more or less depending on the pan size. Just remember they should be very thin). Flip once most of the top looks opaque and dry. Place finished crepes onto layers of paper towels to keep from sticking together.

Directions for Grandma’s Filling:
Beat cream cheese until it is soft. Fold in whipped topping and vanilla. Fill crepe and place fruit inside. Roll and top with a little more filling and fruit. Serve!

Photo Gallery:

Posted in Breakfast Eats, Other Desserts | Tagged , , , | 5 Comments